1.Preconditions
Make sure you have the software shown in the table installed on your computer:
| Version | Software | Owner | Comments |
| setup_HarmanAudioworX_INXS _9.0.19.13_35.exe | GTT | Harman | Or latest release |
| 2.2.4 |
AM
|
AM Third party product |
free 60 days trial – http://www.audiomulch.com/download |
2.Setup
2.1.AmpSrv2 Setup
AmpSrv2 Settings
Open the AmpSrv2 tool. Alternately, AmpSrv2 will launch automatically when connecting to a device
AmpSrv2 surface will be displayed.
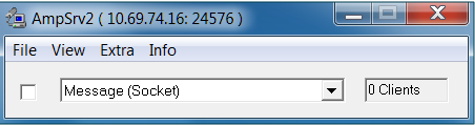
Select Message Socket from the dropdown menu
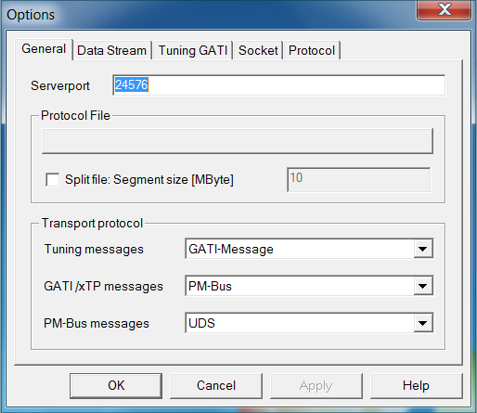
Select File > Options
The AmpSrv2 Options dialog will be displayed.
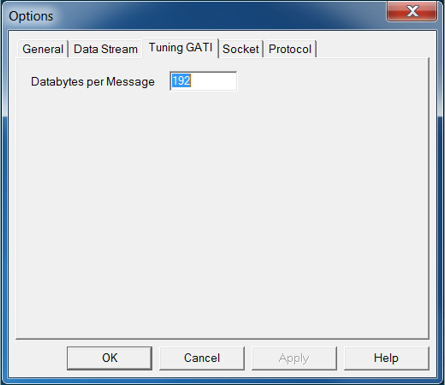
Select tab Tuning GATI and make sure Databytes per is set to 192
Select tab Socket and make sure Protocol is set to GATI
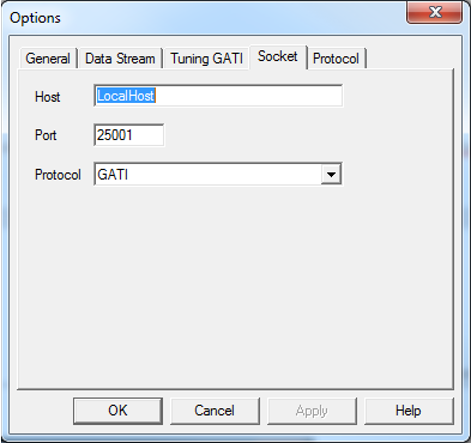
Set Port to 25001
Confirm with OK.
Connect to Virtual Amplifier
Open AmpSvr2
Select Message Socket from the dropdown menu.
Click on checkbox next to the dropdown menu.
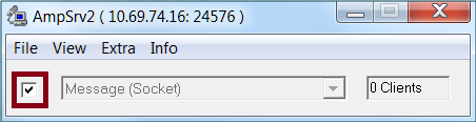
AmpSrv2 is now connected to the virtual amplifier.
If connection fails make sure you have added the virtual amplifier in IVP PluginHost settings and specified the port correctly. See [here] for details.
2.2.GTT Setup
To begin a new tuning session with a device in GTT, there are three options:
- Import an existing project file
- Create a new project and define a new device
- Create a new project and select from a list of known devices
Import an Existing Project File
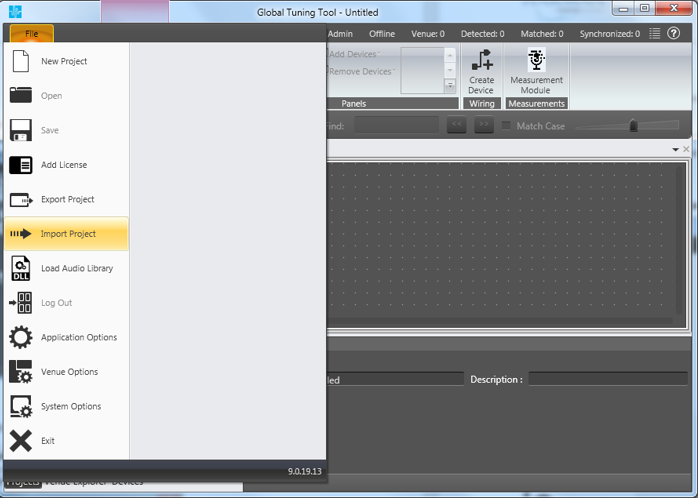
Select File and click on Import Project.
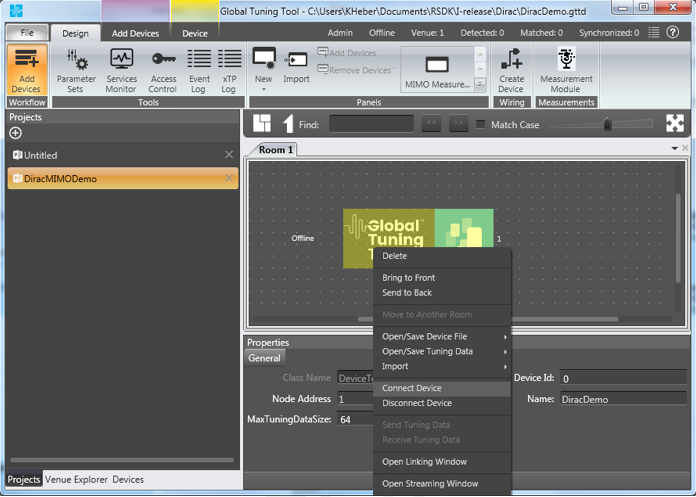
Assuming the existing project already has a signal flow defined within it, right-click on the device you want to tune and select Connect Device.
Create a New Project and Define a New Device
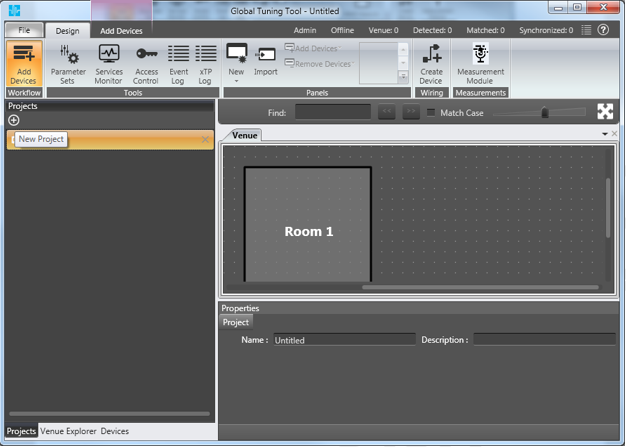
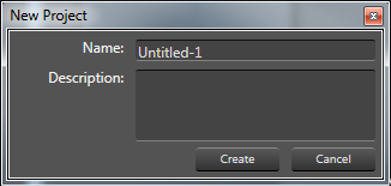
Click the ‘+’ at the top of the Projects tab panel to start a new project.
Give the project a name and description in the subsequent dialog.
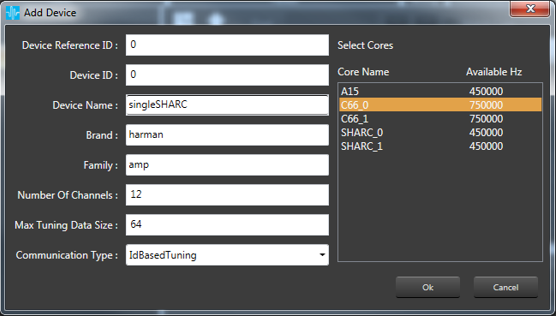
Click on Create Device in the ribbon
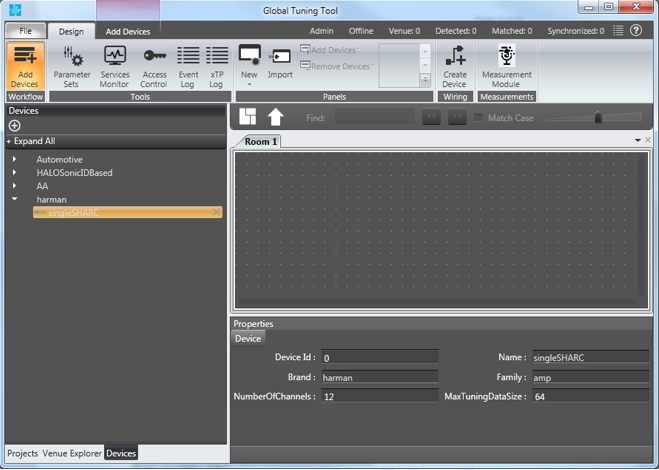
The Add Device Dialog will be displayed with the following parameters:
- Device Reference ID
- Device ID
- Device Name
- Brand – derived from Device Name, required for legacy AA infrastructure
- Family – required for legacy AA infrastructure
- Number of Channels – number of channels supported by the device
- Max Tuning Data Size – Maximum count of bytes included in a single tuning data message
- Communication Type
Select the cores used in the device
Drag and drop the device into the room.

Create a New Project and Define an Existing Device
Click the ‘+’ at the top of the Projects tab panel to start a new project.
Give the project a name and description in the subsequent dialog.
Select the Devices tab in the Project
Drag and drop the desired device into the room.